Celigo Fundamentals: Flow Builder Overview
In the Tools menu there are two options:
- Flow Builder
- Data Loader

Let us look into the Flow Builder. Flow Builder is the key concept of integratorio and helps to build an integration flow from a source to a destination and how we manipulate those data going through.
Let us build a sample Flow that pulls data from Shopify and imports that as a Sales Force account. First let us start with the Add Source.

This is how the flow fetch the data. When we click the Add Source, a side window pops up from where we can select the source. Here we need Shopify, so just type Shopify in the search box to make the selection easier.

After selecting the Shopify as Source in the Connection either we can select an existing connection from the list or we can create a new connection by clicking on the Plus (+) button. Here we are using an existing connection.

Fill the details as shown and click Next, which pops up another window where we need to give the specific details of how we pull the data.


After entering the data we can click on the preview button, when everything is done correctly we get data or an error will be listed. After this we can click the Save or Save and Close button.
After successfully setting the source we get

Now we can go to the Destination.

When we click the Add destination / lookup, popsup a window, from where we select SalesForce as destination .


Here also we can add new connection or select existing one, here we select an existing connection and click Next.


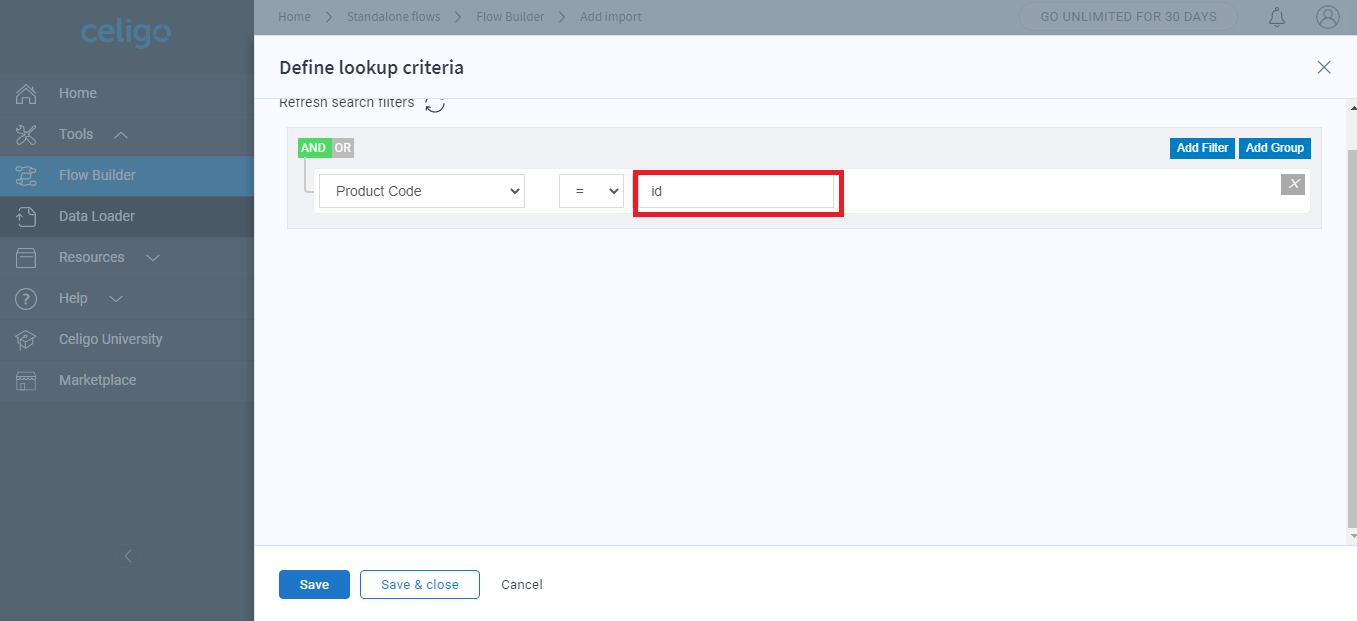
Since we select the Operand Type as Value, we have to type id manually and either click the Save or Save & Close button, and we get

Now click Save or Save & Close, we get

Now we need to do the mapping, for that we need to click the Plus (+) icon in the import

Then click the mapping icon which opens a window
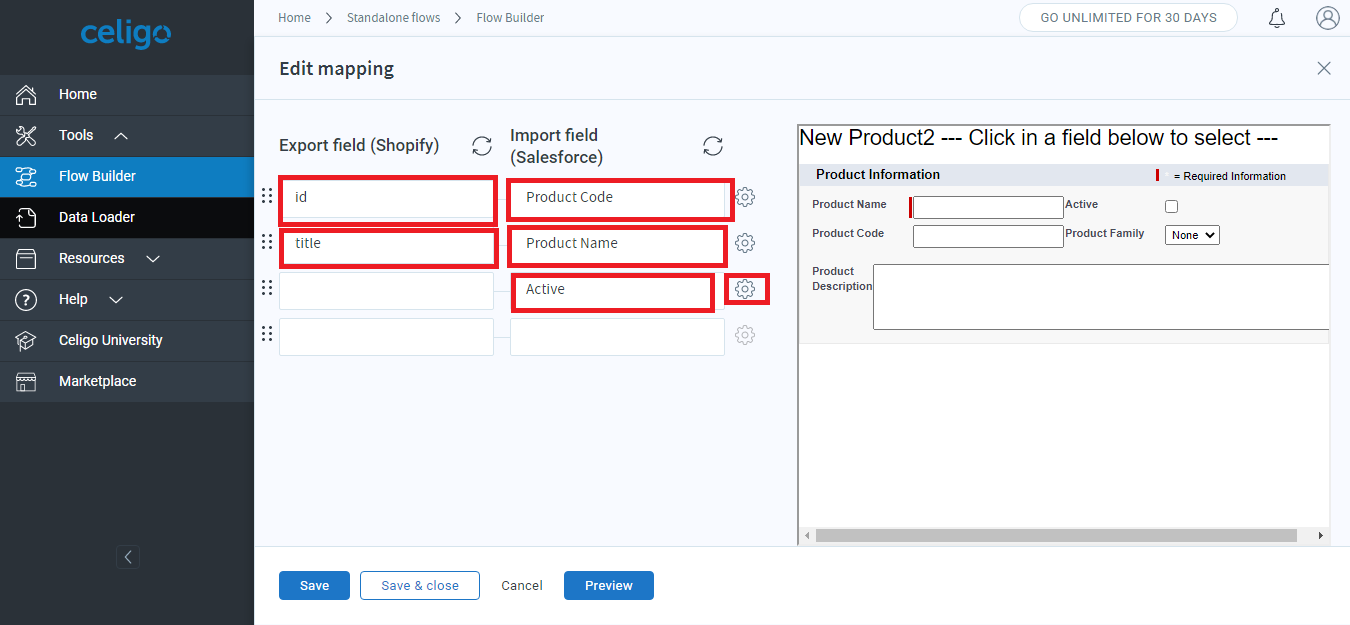
Here we map the fields in the Shopify against the fields in Salesforce. The field Active in Salesforce is a check box, so it have a true or false value. Here we have to set this as a hardcoded value by clicking the gear icon neat to the field.

And click Save.

Now Save or Save & Close.
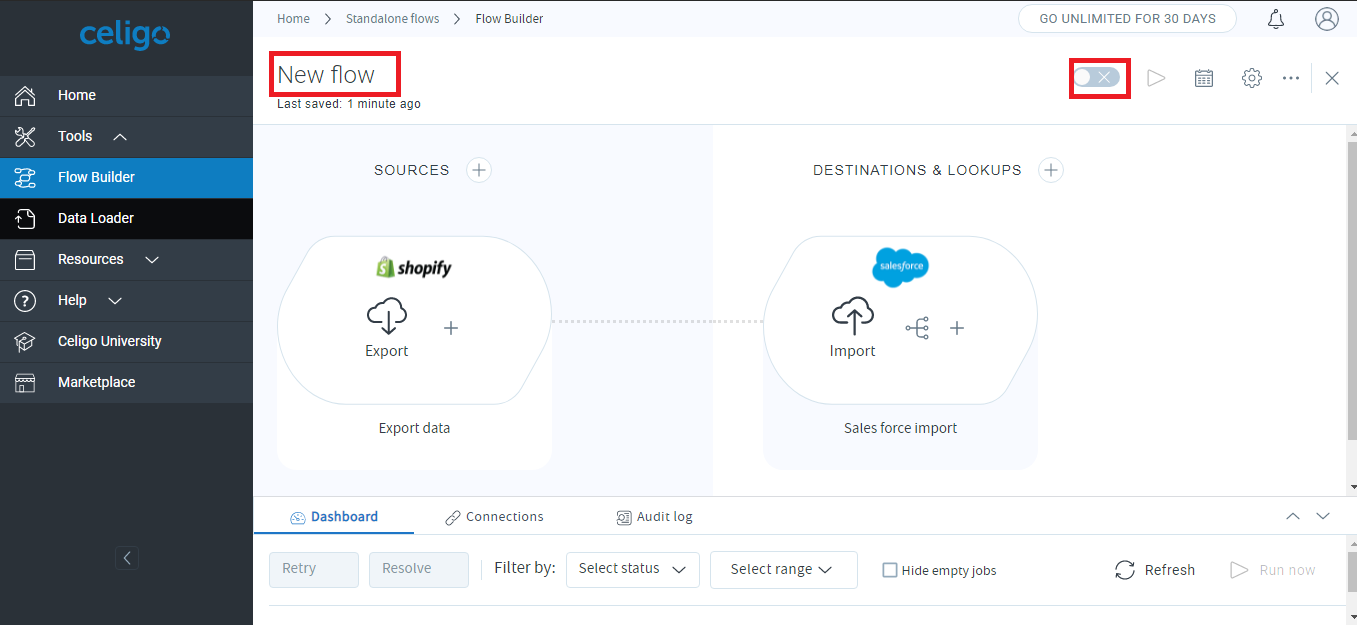
We can also rename the flow by just removing the existing default name New flow to New Demo.Currently this flow is off. We can turn it on by clicking the on/off button.
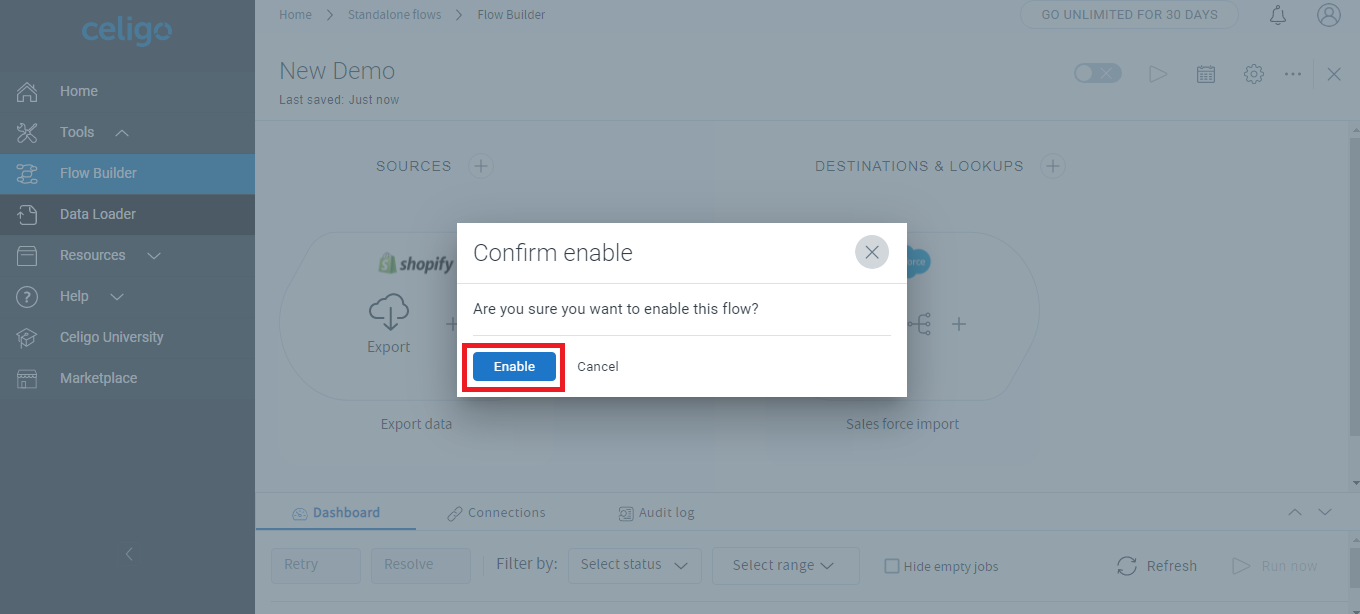
After Clicking Enable the connection will run and we can see the status on the Dashboard. First it will be showing Waiting in Queue as Status to make sure that the connections are available and once connections are available the flow start to process. When the process is complete we can see the Status as Completed.
Also we can check the Connection tab to view the connections in use. We can also change or delete connections

The Audit log helps to view the changes happening in this Data Flow.
In the top right we have the schedule which helps to select how often the flow should run

We can select the Time zone and in the Frequency we can select Once weekly, Once daily, Twice daily, Every eight hours, Every six hours, Every four hours, Every two hours, Every hour, Every 30 minutes, Every 15 minutes. Once we select the Frequency, we need to select the start and end time. If we didn’t select the schedule, it will run only when we hit run

In the Settings, we can change the name of the flow, add Description, if we have multiple data flows within the integration we can change it together.


We also have the ability to Download flow as a zip file or Clone flow and other functions.